How to Build a Compost Bin
At this time of year, there always seems to be so much garden rubbish. What with clearing away dead and dying annuals and vegetables, and cutting back and deadheading, not to mention weeding, you may be forgiven for thinking it never ends! And under the circumstances, you may be thinking that you would prefer to keep your garden waste to turn it into useful compost, rather than donating it to the council to compost on your behalf. It may well, after all, save you having to buy compost so much in future!
 If you are thinking of starting to compost garden waste and kitchen green waste at home, you have two choices. You could buy a composter or two. They are available from compost suppliers as well as garden centres, DIY stores and similar, and your council may even provide them at subsidised cost. But you might feel that the enterprise deserves a home-made compost bin, in the spirit of recycling.
To make a compost bin, you will need:
- wooden pallets or old crates,
- screws for fixing,
- something to line the sides such as plastic sheeting or old carpet.
Pallets and old slat-sided crates are surprisingly easy to come by. Ask at DIY stores and garden centres locally, visit building sites, and generally ask around. And if you can’t find pallets or crates, you will almost certainly be offered suitable timber, if you will only remove it!
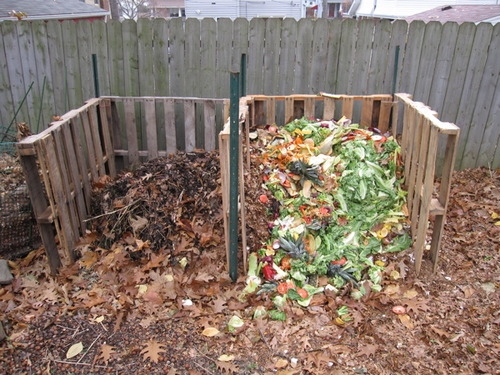
Select your site. You need room for two compost bins, ideally, side by side (one to fill, and one to be rotting away quietly to itself), and you don’t really want to be looking at them all the time. Plus, in summer, they will probably turn into wasp-magnets, so keep them away from your seating area or barbecue.
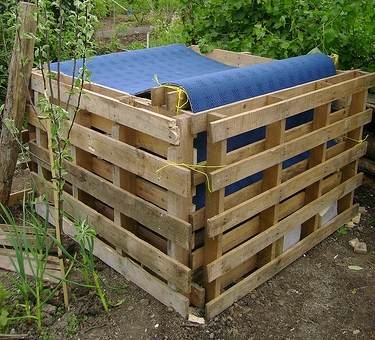 If you have a crate, lower it into the soil by digging trenches and settling the base in. This has two functions: it keeps the crate anchored, and also allows the worms easy access. If you have pallets, you’ll need to screw them together on three sides, leaving the bottom and front side open. Ideally, have a helper at this stage, as pallets can be quite heavy to hold in place! Using brackets, place single slats to cover the front, to make a removable fourth side for easy access in due course. Line the sides, but not the bottom, with plastic or carpet, as this makes the compost heap warmer and more likely to rot quickly. Keep some aside to cover the top later.
Once you start using the compost heap, you’ll probably find that worms arrive. But if you feel there aren’t enough, you can always buy some from Wiggly Wigglers to ensure that you have beautiful compost in a year or so.